
Want to learn more about OAuth 2.0 and OpenID Connect?
Save yourself days of digging through dozens of specs with this online course
More informationMy high-quality idiot-proof recording setup
Good audio for virtual presentations is absolutely critical. Even before the new world of 2020, I was delivering remote training and recording videos, so I invested in a decent audio setup. Since the Corona pandemic coincided with the birth of our third child, training from home sure became a totally new challenge. To make that as comfortable as possible, I built myself a standing desk and added a dedicated camera to the setup. A few people asked about my setup, I decided to provide a bit more details in this article.
21 May 2020 Productivity Recording, Training
I am an idiot
I am an idiot when it comes to audio. I listen to music, and I know that blasting Hardwired from Metallica really keeps you awake. Other than that, I don’t know the first thing about the technicalities of audio quality. I don’t know anything about microphones, interfaces, and what else is out there. And quite frankly, I have no interest in figuring it all out.
In the past, I used the NT-USB microphone from Røde. It is a brilliant piece of equipment as far as setup goes. Plug it in and start talking. The sound quality is also great, but I found the output a bit too nasal for my liking.
When there is room for improvement, I have the tendency to accept the challenge and level up. Since I was buying my own equipment anyway, this was a perfect time.
So going into this adventure, I had two main requirements:
- The quality of the audio needed to be better, preferably with a less nasal sound
- The tech has to be idiot-proof since I will be operating it
It took hours of researching different types of microphones, their properties, the required hardware, and listening to sample clips. As it turns out, figuring all of this out with only a couple of online resources is a bit of a gamble, but it worked out, and I’m really happy with my setup.
Let’s dive right in.
The microphone
It turns out that dynamic microphones typically give better results compared to condenser mics. Please, don’t ask me why, as I have no idea. The problem with a dynamic microphone is that it plugs into an audio interface. The interface presumably does something magical to transform the signal into output that my mac can use (again, don’t ask).
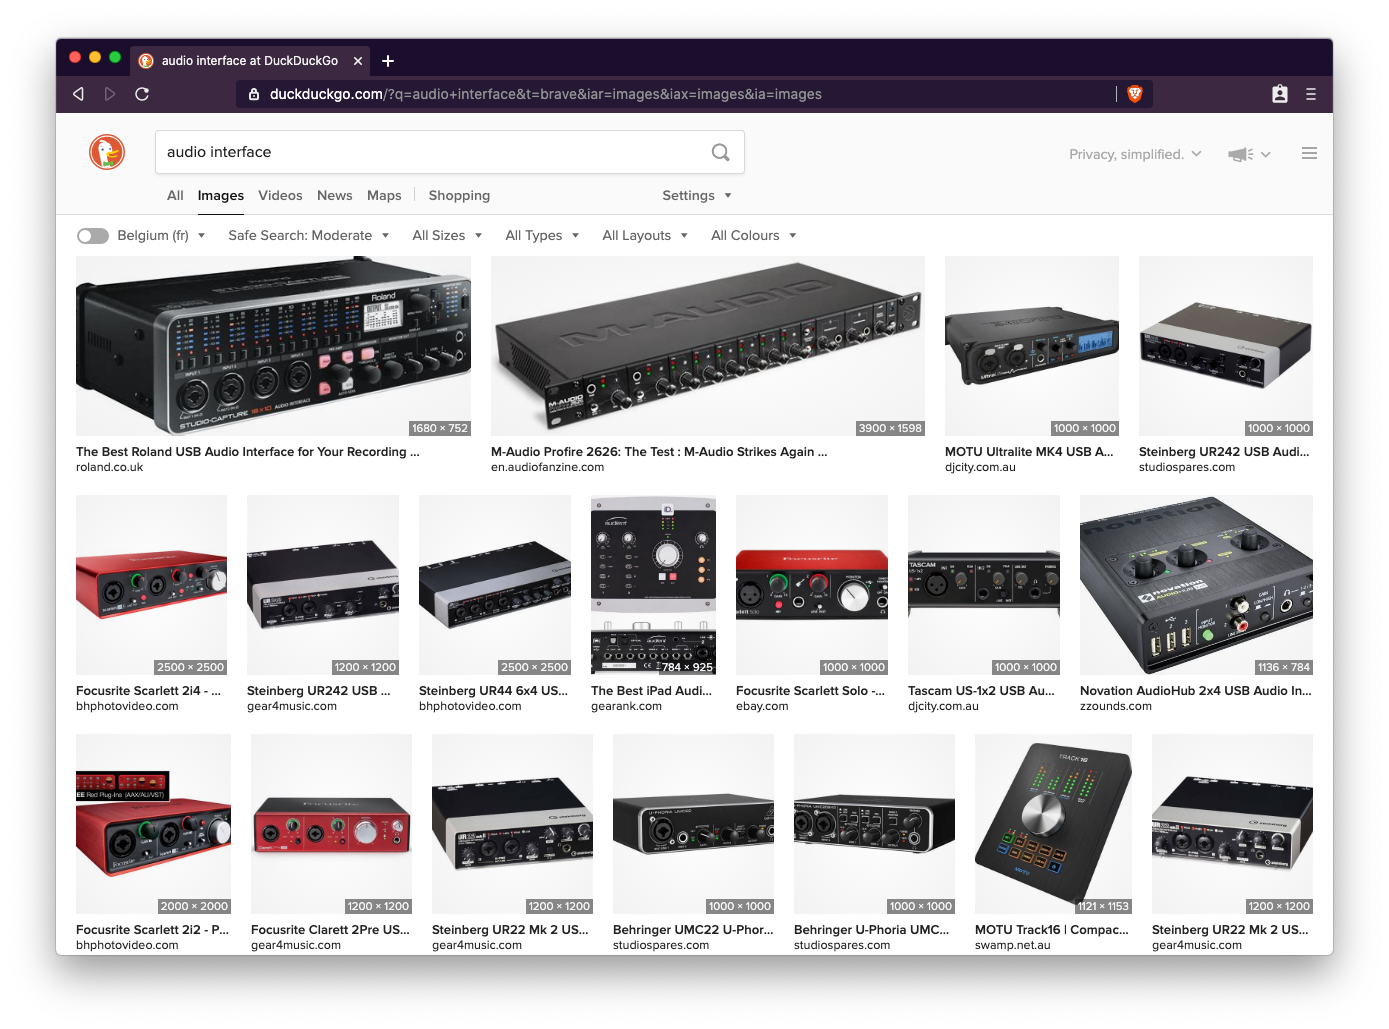
A quick search for audio interfaces quickly gives you something as shown below, which frankly scares me. There are a lot of buttons and settings to mess up, which is a clear violation of the second requirement. This seems far from idiot-proof.
I did not want to deal with that, so I started looking into condenser mics. These typically plug directly into a computer and are good to go. But based on my experience with the NT-USB from before, I had my doubts. After reading a couple of audiophile websites and listening to a couple of comparison clips, I had the impression that my gut feeling was spot on. The audio quality of a condenser mic would not satisfy me.
So back to the dynamic mics. I managed to find a not-too-expensive and not-too-complex audio interface: the Steinberg UR12. So time to start looking into mics. Given that the NT-USB microphone I used before was really solid, I definitely did not mind going for a Røde again. I was not hell-bent on having a Røde, but as it turns out, they just have solid equipment.
I would like to tell you that I did an extensive product analysis, but I don’t really remember the selection process. I remember I looked at a few models, but in the end, I settled for the Røde Procaster. It seemed a solid mic and I found a bunch of people online using the same mic for podcasts and recording.
I also wanted it easy to use during live online training, so I also looked into a table mount arm to attach the mic to my desk. Again, Røde to the rescue, with the PSA-1. To absorb noise from bumps and other movements, I also added the PSM-1 shock mount to the shopping list.
Finally, I added a windshield as well. While it may not be necessary, I assumed it wouldn’t hurt either (and it turns out, that was again a good guess).
With this shopping list, I started looking around to buy all that. While adding all that equipment to my basket, I encountered another option for an audio interface: the Røde AI-1. This one looks even simpler than the one I picked. The interface has one meaningful button for recording, and that’s the volume. They even added a light to indicate if you’re too loud. That sounds like something I can manage. So what if that is enough?
In the end, I eventually settled for the Røde AI-1. In hindsight, I am extremely happy with my choice. I find the quality better than the NT-USB, and I don’t need to scrub audio files to take out small annoying noises. If you want to listen for yourself, here are two clips which are recorded in the same room.
Apart from the audio quality, the equipment is solid, and I haven’t messed it up (yet). The equipment was not cheap, but I don’t mind paying a bit more for quality gear. Here’s an overview of the different components and their prices.
| Description | Product | Price |
|---|---|---|
| Microphone | Røde Procaster | 140,49 |
| XLR Cable | It's black | 11,77 |
| Audio interface | Røde AI-1 | 98,35 |
| Desk mount | Røde PSA-1 | 73,55 |
| Shock mount | Røde PSM-1 | 35,00 |
| Windshield | Røde WS2 | 16,52 |
Prices are from April 2019, excl. VAT
I realize that this article is starting to read like a commercial for Røde. That is purely coincidental, as I am not affiliated with Røde, nor do I benefit from recommending their products in any way.
The camera
In the past, I occasionally delivered training courses remotely. The video is mostly a screenshare of slide material and demo applications, so a camera never really mattered much. I used to give an introduction with the built-in camera turned on, and then move right to the actual content.
With the global pandemic going on, remote training has become the de facto standard for training courses. That includes presentations for smaller groups, where everyone is engaged using a video feed. That’s why I decided to look into the option of having a video feed of me while presenting.
When I teach live courses, I am standing on my feet all day. I have found that a lively presentation from a sitting position is much harder. So I decided to build myself a standing desk for my remote training courses. Since a decent standing desk is quite expensive (even one from Ikea), and I did not know if I would like standing at a desk, I went the DIY route. I built it out of an old door (not kidding) and some wooden beams I still had in the shed. It is rock solid and I love it, by the way, so highly recommended.
Back to the main story here. One of the drawbacks of the standing desk is the camera angle. I can offer training participants a great view of the bottom of my chin, backed by a bright light on the ceiling. Not ideal. I was a bit late to the party figuring this out, and by then, webcams were effectively sold out everywhere. So time to get creative.
I use a separate phone for traveling, so I looked into turning that phone into a camera. As it turns out, turning an iPhone into a camera is not that easy, even on all Apple devices. I eventually settled on the EpocCam app, as their free trial gave me confidence in the setup. I purchased the full app, and am again happy with the result. Surprisingly, the wifi connection works better than the USB connection. After about a dozen hours presenting with it, I can say confirm that it works flawlessly.
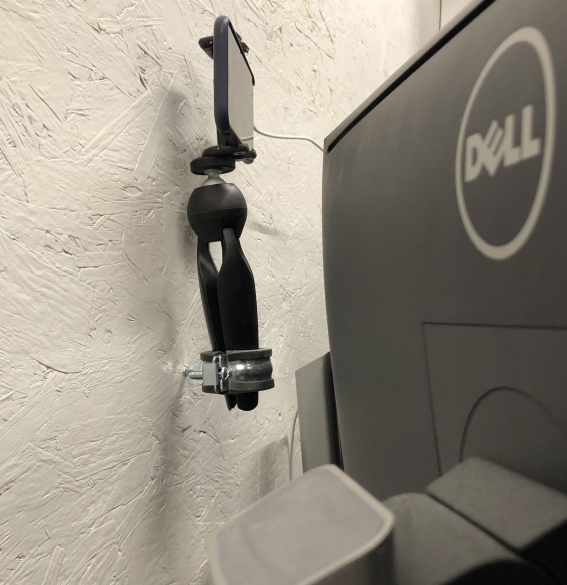
Mounting the camera on eye height was not hard to solve. I had a tabletop tripod lying around from before, so that seemed the easiest way to attach the phone to the wall facing me. A bit of digging around in the tool shed quickly yielded a number of options. It turns out that a simple pipe clamp suffices to fixate the tripod, so that was easy. Nothing like a bit of redneck engineering 😎
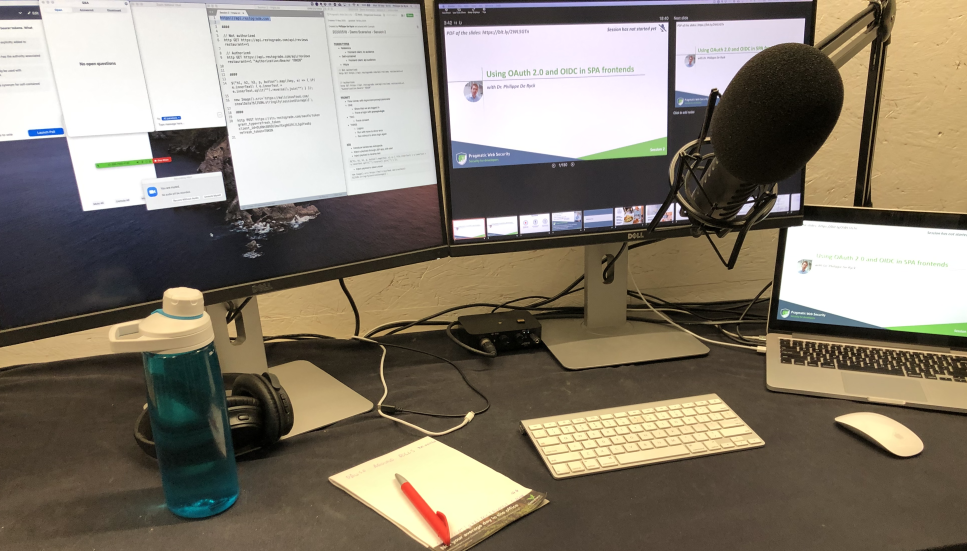
Monitor setup
The final piece of the puzzle are the monitors. I’ve been a dual monitor power user for 20 years now, so I’m definitely used to having some screen real estate. When I purchased my monitors a few years ago, the Dell UltraSharp 25 inch monitor had a great price/quality ratio. Two 25 inch monitors give me all the space to get my daily work done.
When presenting remotely, I have my presentation being broadcasted, and I have my presenter view on a separate screen. However, when running a presentation over Zoom, there are also windows to manage participants, handle Q&A, and chat with the participants. A dual monitor setup in presenting mode works, but is not really comfortable when running a bunch of webinars. Fortunately, I was still using my good old Retina MacBook, even though I used to keep it closed, with only the external monitors enabled. But now, the built-in screen is more than useful to keep an eye on everything that’s going on.
Summary
As you may have guessed from this post, I don’t like being slowed down by practical limitations. I’ll be streaming and recording dozens of hours of training, so my setup needs to be comfortable. I am really happy with the recording setup, the camera, and my DIY standing desk.
I realize that I am fortunate to be able to afford such stellar equipment. But as you can see with my desk or camera mount, a bit of creativity already gets you far. The main takeaway here is to find the most effective approach to get you started on your own projects. And keep in mind that you can always upgrade your equipment later if necessary.
About Dr. Philippe De Ryck
Hi, I'm Philippe, and I help developers protect companies through better web security. Learn more about my security training program, advisory services, or check out my recorded conference talks.
Want to learn more about OAuth 2.0 and OpenID Connect?
Save yourself days of digging through dozens of specs with this online course
More information
Dr. Philippe De Ryck
Hi, I'm Philippe, and I help developers protect companies through better web security. As the founder of Pragmatic Web Security, I travel the world to teach practitioners the ins and outs of building secure software.
Talks and workshops
You will often find me speaking and teaching at public and private events around the world. My talks always encourage developers to step up and get security right.
Articles
Security is often about small nuances. In my articles, I dive deeper into various security topics, providing concrete guidelines and advice. My articles also answer questions I often get while speaking or teaching.
Security resources
Getting security right is all about knowledge. I strongly believe in sharing that knowledge to move forward as a community. Among my resources, you can find developer cheat sheets, recorded talks, and extensive slide decks.
Mailing list
Subscribe to the Pragmatic Web Security mailing list to stay up to date on the latest activities and resources.